Proudly Made in the USA
5 Easy DIY Nautical Decor Ideas to Refresh Your Space
There’s something special about decorating your home with pieces you’ve created yourself, don’t you think? It adds a layer of personal meaning and pride, and when it comes to nautical decor, DIY projects are the perfect way to capture that relaxed, coastal charm without breaking the bank.
Whether you’re a seasoned DIYer or just dipping your toes into crafting, nautical-themed decor is a natural fit for do-it-yourself projects. With its mix of soft blues, rustic textures, and timeless symbols like anchors and ropes, this style gives you endless opportunities to create something both beautiful and meaningful.
At ShopAnchorArt.com, we’re big believers in the idea that your home should feel like a reflection of you—and that’s why we love pairing handcrafted anchor wall art with DIY decor. In this article, we’ll explore five simple and budget-friendly nautical crafts that will refresh your space and give it that cozy, lakefront vibe you’ve been dreaming of.
From rope-wrapped candle holders to DIY anchor wall hooks, these projects are designed to be approachable, fun, and full of coastal charm. And the best part? They’re easy enough to tackle in a weekend, leaving you with a home that feels uniquely yours.
So, grab your glue gun, set out your craft supplies, and let’s dive into the world of DIY nautical decor!

DIY Idea #1: Rope-Wrapped Candle Holders
There’s just something about the simplicity of rope-wrapped candle holders that feels perfectly nautical. They’re easy to make, affordable, and instantly bring that cozy, lakefront vibe to any room. Plus, they’re versatile—you can use them as table centerpieces, shelf decor, or even accent lighting for your patio.
Materials You’ll Need
Before we get started, gather these supplies:
-
Glass candle holders or mason jars (any size you like).
-
Natural jute or sisal rope.
-
A hot glue gun and glue sticks.
-
Scissors.
-
Optional: Seashells, starfish, or small nautical charms for embellishment.
How to Make Rope-Wrapped Candle Holders
Step 1: Prep Your Glass Holder
Clean your glass candle holder to ensure the rope sticks properly. Let it dry completely before you begin.
Step 2: Attach the Rope
Start at the base of the glass holder. Apply a small bead of hot glue and press the end of the rope into it. Wrap the rope tightly around the candle holder, adding a small line of glue every few inches to keep it secure. Continue until the glass is covered to your desired height.
Step 3: Trim and Secure
Once you’ve reached the top, cut the rope and glue the end neatly in place. You can leave some of the glass exposed for a layered look or cover the entire holder—it’s up to you!
Step 4: Add Finishing Touches
For extra nautical charm, glue small seashells or starfish to the rope. You can also tie a piece of thin twine around the holder and attach a small anchor charm for a personalized touch.
Step 5: Add Candles
Place a tea light or votive candle inside, and voila! Your rope-wrapped candle holder is ready to shine.
Styling Ideas
-
Dining Table Centerpiece: Group three rope-wrapped candle holders of varying heights on a wooden tray. Add a few sprigs of greenery, some loose seashells, and a lantern for a complete nautical centerpiece.
-
Bathroom Accent: Place a single candle holder on your bathroom counter with a stack of folded navy towels to create a spa-like vibe.
-
Outdoor Patio Decor: Line your patio table with these candle holders for soft, glowing light during evening gatherings.
Why This Project Works
Rope-wrapped candle holders are the perfect example of how small, thoughtful touches can elevate your decor. They bring texture, warmth, and a coastal charm that complements any nautical theme. Plus, they’re easy to customize with embellishments that reflect your personal style or tie into your existing decor.
At ShopAnchorArt.com, we love pairing DIY accents like these with larger statement pieces, like our custom anchor wall art, to create cohesive spaces that feel polished and personal.

DIY Idea #2: Driftwood Wall Art
There’s a certain charm to driftwood—it’s rustic, weathered, and carries the essence of the water. Driftwood wall art is one of the easiest and most beautiful ways to bring that coastal charm into your home. Whether you create a simple arrangement or something more intricate, it’s the kind of decor that feels both personal and timeless.
And here’s the best part: it pairs perfectly with custom anchor wall art to create a layered, nautical vibe in any room.
Materials You’ll Need
To get started, gather these materials:
● Pieces of driftwood (collected from the beach or purchased at a craft store).
● A sturdy backing surface like a wood panel, canvas, or reclaimed wood frame.
● A hot glue gun or industrial adhesive.
● Scissors or small pruning shears (to trim driftwood if necessary).
● Optional: Rope, small shells, or metal anchor embellishments for added detail.
How to Make Driftwood Wall Art
Step 1: Plan Your Design
Before you start gluing, lay out your driftwood pieces on your backing surface. Play around with different arrangements—horizontal, vertical, or even circular patterns. For a truly nautical look, consider creating the shape of an anchor, starfish, or heart with the driftwood.
Step 2: Prepare Your Driftwood
If the driftwood pieces are too long or uneven, use scissors or pruning shears to trim them down to size. Clean the pieces to remove any dirt or debris, and let them dry completely before assembling.
Step 3: Assemble the Art
Working one piece at a time, apply a bead of hot glue or adhesive to the back of each driftwood piece and press it firmly onto your backing surface. Start with the larger pieces and fill in the gaps with smaller ones.
Step 4: Add Embellishments (Optional)
Once the driftwood is secured, you can add embellishments to personalize your piece. For example, wrap sections with rope, glue on small seashells, or attach a small metal anchor charm for extra character.
Step 5: Hang It Up
Attach a hanging wire or hooks to the back of your panel, and your driftwood wall art is ready to display!
Styling Ideas
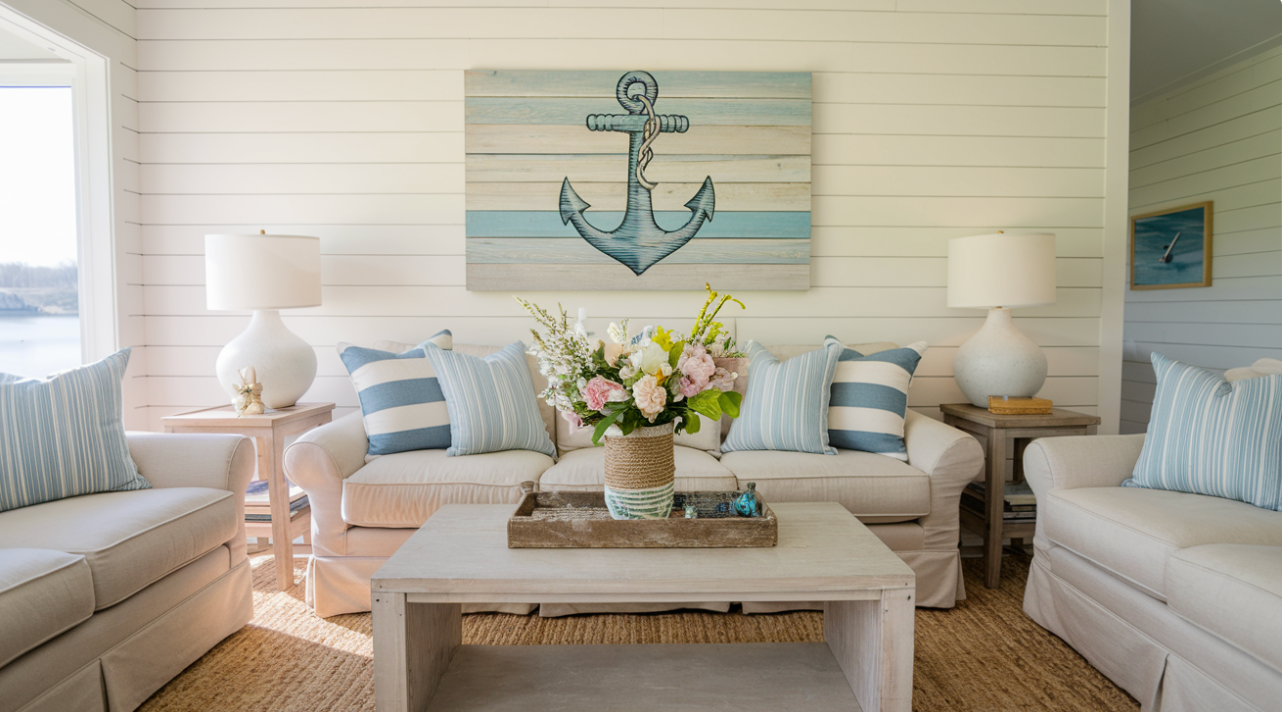
● Living Room Statement Piece: Hang your driftwood art above the sofa or fireplace. Pair it with a large custom anchor wall art piece for a stunning focal point that ties the room together.
● Hallway or Entryway Accent: A smaller driftwood piece can add warmth and texture to narrow spaces like hallways or entryways.
● Outdoor Spaces: If your driftwood is sealed to protect it from the elements, consider hanging it on your patio wall to bring a rustic, nautical vibe outdoors.
Why This Project Works
Driftwood wall art is the perfect blend of rustic and refined. It brings natural textures into your home, creating a sense of warmth and connection to the water. And because every piece of driftwood is unique, your finished project will be completely one-of-a-kind.
At ShopAnchorArt.com, we love how driftwood decor complements our custom anchor wall art. The combination of natural textures and personalized designs creates a layered, meaningful look that feels effortlessly coastal.

DIY Idea #3: Anchor-Themed Wall Hooks
Who says practical can’t also be stylish? Anchor-themed wall hooks are the perfect DIY project to add both function and nautical charm to your home. Whether you need a place to hang coats in the entryway, towels in the bathroom, or bags in the mudroom, these hooks are a quick and easy way to bring a coastal touch to your space.
The best part? You can personalize them to match your decor, making this project as unique as your home.
Materials You’ll Need
Here’s what you’ll need to make your own anchor-themed wall hooks:
● Wooden or metal anchor shapes (available at craft stores or online).
● Sturdy wall hooks (look for ones in black, white, or metallic finishes).
● A wood plank or reclaimed wood board as the base.
● Screws and a screwdriver or drill.
● Paint or wood stain (optional, for custom finishes).
● Sandpaper (if using unfinished wood).
● Optional: Rope or small nautical embellishments for added detail.
How to Make Anchor-Themed Wall Hooks
Step 1: Prep Your Base
If you’re using an unfinished wood board, start by sanding it down to create a smooth surface. Apply a wood stain or paint in a color that complements your decor. Let it dry completely.
Step 2: Attach the Anchors
Lay out your wooden or metal anchor shapes along the board. Space them evenly and make sure they’re aligned properly. Secure each anchor to the board using screws or strong adhesive, depending on the material.
Step 3: Add the Hooks
Position the hooks just below each anchor. Drill them into place, making sure they’re sturdy enough to hold items like coats, towels, or bags.
Step 4: Personalize the Design
For extra nautical flair, consider wrapping sections of the board with rope or gluing on small seashells. You can also paint the anchors in soft coastal colors like navy, white, or sandy beige.
Step 5: Mount Your Wall Hook Rack
Attach hanging hardware to the back of the board, then mount it on your wall. Be sure to use anchors (the drywall kind!) if you’re hanging heavier items.
Styling Ideas
● In the Entryway: Hang your anchor wall hooks near the door to create a welcoming space for guests. Pair it with a jute rug and a small bench for a complete coastal vibe.
● In the Bathroom: Use these hooks to hold towels or robes. For a spa-like feel, style the space with soft blue accents and a driftwood mirror.
● In the Mudroom: Mount the wall hooks above a storage bench to create a functional and stylish space for jackets, bags, and hats.

Why This Project Works
Anchor-themed wall hooks are the perfect marriage of form and function. They make your everyday routines a little easier while adding a personal, nautical touch to your decor. The combination of practical utility and coastal style ensures these hooks will be a standout feature in any room.
At ShopAnchorArt.com, we love pairing functional pieces like these with our custom anchor wall art. Together, they create spaces that are not only beautiful but also reflect the meaning and personality of your home.

DIY Idea #4: Nautical Rope Mirror Frame
Nothing says “coastal charm” quite like a rope-framed mirror. It’s the kind of statement piece that instantly transforms any space, from an entryway to a bathroom, giving it a warm, nautical vibe. Plus, this project is easy to customize—you can go big and bold or keep it subtle, depending on your style.
Let’s dive into the steps to create a beautiful nautical rope mirror frame that will leave your guests saying, “Where did you get that?”
Materials You’ll Need
Here’s what you’ll need for this project:
● A round or rectangular mirror (any size you like).
● Thick natural rope (jute or sisal work best).
● A hot glue gun and glue sticks.
● Scissors
● Optional: Small anchor charms, seashells, or starfish for embellishment.
How to Make a Nautical Rope Mirror Frame
Step 1: Prep the Mirror
Start with a clean mirror surface. Lay it on a flat workspace and decide where the rope frame will go. If the mirror already has a thin frame, you can glue the rope directly onto it. If it’s frameless, you’ll be attaching the rope to the edges of the mirror itself.
Step 2: Attach the Rope
Apply a small bead of hot glue to the edge of the mirror, starting at one point. Press the end of the rope into the glue and hold it firmly until it’s secure.
Continue applying glue in small sections, pressing the rope into place as you go. Work your way around the mirror, making sure the rope sits tightly against the surface.
Step 3: Layer the Rope (Optional)
For a thicker frame, repeat the process with a second or third layer of rope. Each layer adds texture and dimension, giving your mirror a more dramatic, finished look.
Step 4: Add Embellishments (Optional)
Once the rope is in place, you can personalize the frame by attaching small nautical accents. Glue on seashells, starfish, or tiny anchor charms for extra coastal flair.
Step 5: Hang Your Mirror
Attach hanging hardware to the back of the mirror if it doesn’t already have it, and mount it on the wall. Make sure the hardware is secure, especially if the mirror is large or heavy.
Styling Ideas
● In the Entryway: Hang the rope mirror above a console table and pair it with anchor wall art for a cohesive nautical look. Add a vase of fresh greenery or a lantern for a welcoming touch.
● In the Bathroom: Use the rope mirror as the centerpiece of a coastal-themed bathroom. Pair it with soft blue walls, driftwood accents, and white towels for a spa-like vibe.
● In the Bedroom: Place the mirror above a dresser or nightstand to reflect light and make the space feel larger and brighter.
Why This Project Works
A rope-framed mirror brings texture, warmth, and coastal charm into your home. It’s a simple yet impactful piece that ties together nautical decor themes. Plus, because it’s handmade, it carries a personal touch that mass-produced decor just can’t replicate.
At ShopAnchorArt.com, we believe in the power of meaningful decor. Pairing DIY pieces like this rope mirror with custom anchor wall art creates a balanced, thoughtful design that feels personal and timeless.

DIY Idea #5: Nautical-Inspired Table Centerpiece
A beautifully styled table can transform any gathering into a memorable experience, and a nautical-inspired centerpiece is the perfect way to set the mood. This project combines rope, lanterns, and seashells to create a centerpiece that’s charming, functional, and easy to customize. Whether you’re hosting a dinner party or simply sprucing up your everyday decor, this DIY project brings coastal charm to your table.
Materials You’ll Need
Here’s what you’ll need to craft your nautical-inspired centerpiece:
● A rectangular or round wooden tray (natural wood or painted in a coastal color).
● One or two lanterns (glass or metal, depending on your style).
● Natural jute or sisal rope.
● Loose seashells, starfish, or small pieces of driftwood.
● Optional: Mini anchor accents, candles, or sprigs of greenery.
How to Create a Nautical Table Centerpiece
Step 1: Choose Your Tray
Start with a wooden tray as the base of your centerpiece. If you’re using an unfinished tray, consider painting it in soft blue, white, or sandy beige to match your decor.
Step 2: Add the Lanterns
Place one or two lanterns in the center of the tray. These will act as the focal point of your centerpiece. For a balanced look, use lanterns of varying heights.
Step 3: Arrange the Rope
Take a length of natural rope and weave it loosely around the lanterns. Let it drape naturally to create texture and flow. You can secure the rope in place with small pieces of double-sided tape if needed.
Step 4: Add Nautical Accents
Scatter seashells, starfish, or small pieces of driftwood across the tray. These accents will fill in the empty spaces and add layers to your design. If you have mini anchor charms, tuck them into the arrangement for an extra touch of nautical charm.
Step 5: Optional Embellishments
If you’d like to add more dimension, place small candles inside the lanterns or around the tray. For a fresh, organic element, tuck sprigs of greenery or eucalyptus into the design.
Step 6: Style It on Your Table
Place the finished centerpiece on your dining table, coffee table, or kitchen island. Make sure it’s centered and adjust the elements as needed to create a balanced look.
Styling Ideas
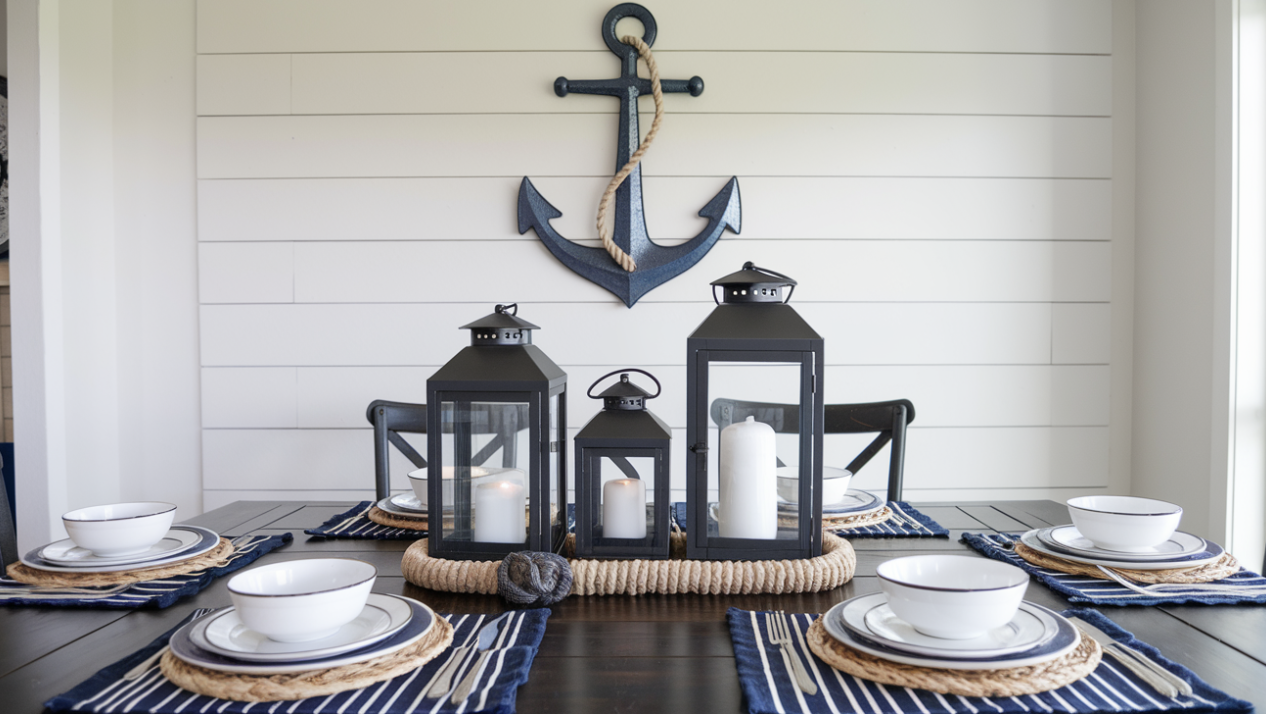
● Dining Table: Use the centerpiece to dress up your dining table for a casual dinner party or family meal. Pair it with navy napkins, white plates, and striped table runners for a cohesive look.
● Coffee Table: Place the centerpiece on your living room coffee table for a touch of nautical charm that’s easy to update with seasonal accents.
● Patio Table: For outdoor gatherings, add a citronella candle to the lanterns and pair the centerpiece with nautical-themed placemats.
Why This Project Works
This centerpiece brings the perfect mix of texture, light, and coastal vibes to your home. It’s versatile enough to work in any room and can easily be updated for different seasons or occasions. Best of all, it’s a simple DIY project that looks polished and professional.
At ShopAnchorArt.com, we love how a nautical-inspired centerpiece can complement our custom anchor wall art. Together, they create a cohesive design that ties your space to the tranquility and beauty of the water.
Your DIY Nautical Space Awaits
There’s nothing quite like adding a personal touch to your home through DIY decor, especially when it connects to something you love—like the tranquility of the water. From rope-wrapped candle holders to driftwood wall art, these simple yet stunning projects let you bring the timeless charm of nautical design into your space while creating something uniquely yours.
The beauty of these DIY ideas lies in their versatility. Whether you’re updating your lakefront retreat or adding a coastal vibe to a city apartment, each project can be tailored to fit your style, budget, and space. And let’s not forget the satisfaction that comes from knowing you made something with your own two hands!
At ShopAnchorArt.com, we believe in decorating with meaning. DIY nautical decor is a great way to infuse your space with personality, and when paired with our custom anchor wall art, you can take your design to the next level. Together, these elements create a home that feels warm, welcoming, and connected to the water you love.
Now it’s time to get crafting! Choose one (or all) of these DIY ideas and start creating a space that reflects your love for all things nautical. Need a centerpiece or statement piece to anchor the room (pun intended)? Explore our customanchor wall art collection to find the perfect finishing touch for your DIY-inspired home.
Let’s make your home as unique and meaningful as the memories you’ll create in it.